Recalbox RGB Dual Manual

Recalbox RGB Dual Manual
Thank you for choosing Recalbox RGB Dual! We hope this brings you one step closer to the experience you've been looking for!
Enjoy playing Recalbox and Recalbox RGB Dual!
1 - Compatibility with Recalbox
Recalbox RGB Dual is plug and play with Recalbox since the 8.1-Electron version.
2 - Prerequisites
To use Recalbox RGB Dual you will need:
- A Raspberry Pi 3, 4, 400, or Zero 2
- A monitor or a CRT TV
- A SCART cable (TV) or VGA cable (Monitor)
- Recalbox 8.1+.
3 - Connection
Connecting the Recalbox RGB Dual is easy, but always remember to make sure you're connecting it the right way and to the right pins!
Remember to unplug all cables (power, SCART, VGA) before any changes.
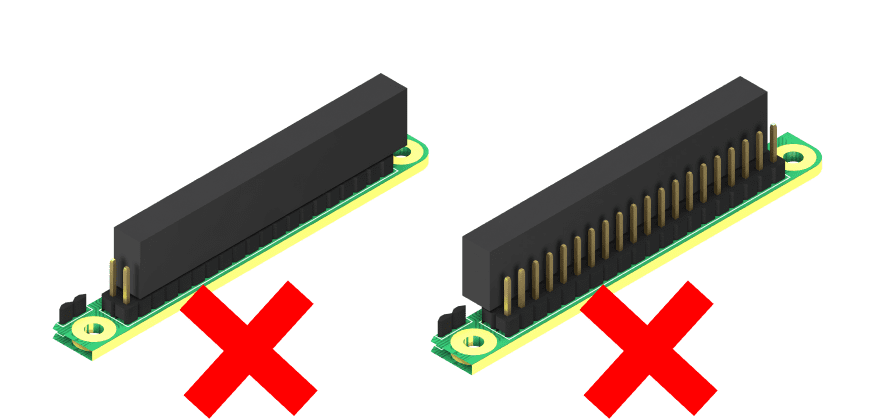
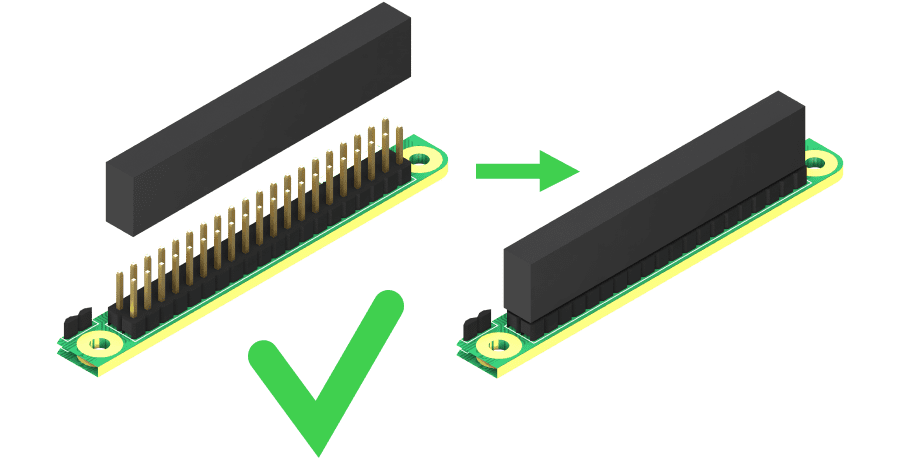
4 - RPi 3 and 4
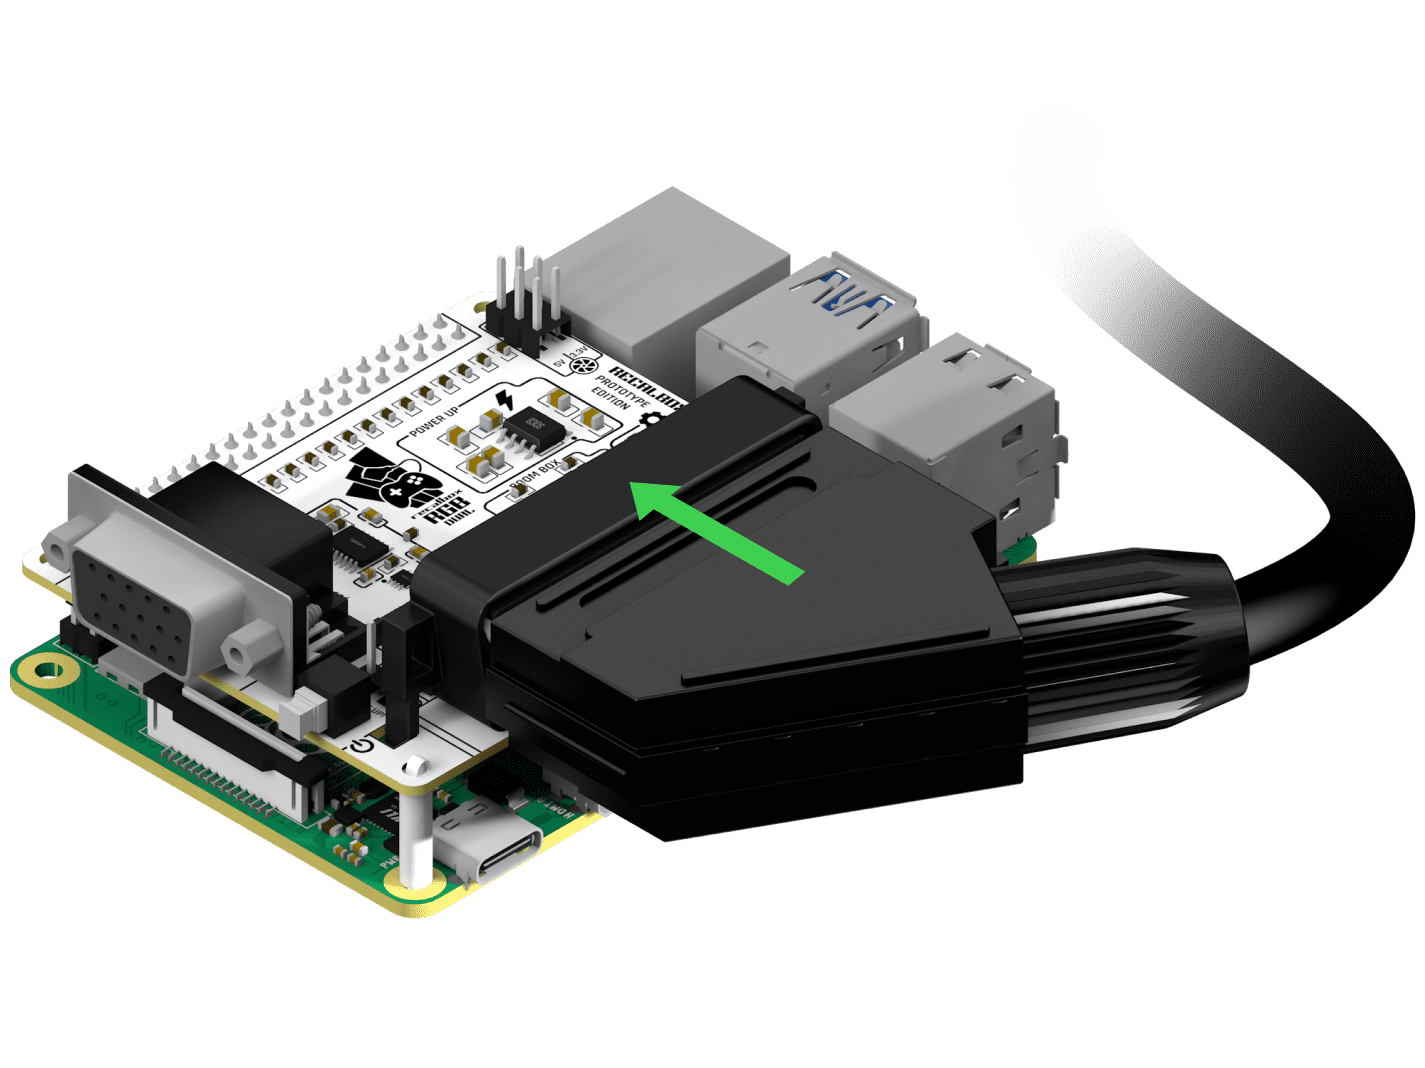
On Rasbperry Pi 3 and 4, it's really simple: clip the Recalbox RGB Dual directly on the GPIO (pins) of the Raspberry Pi and clip the spacers (white plastic supports under the SCART) in the holes provided for this purpose!
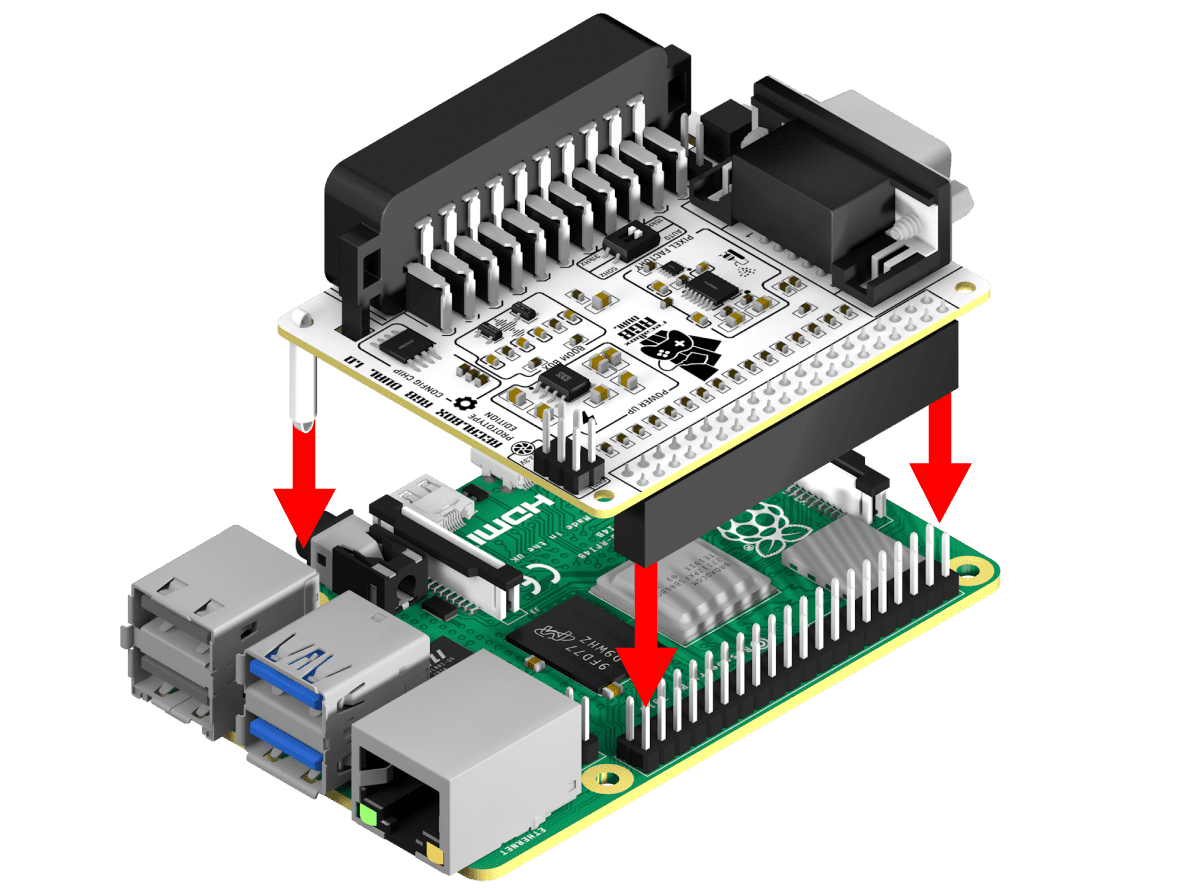
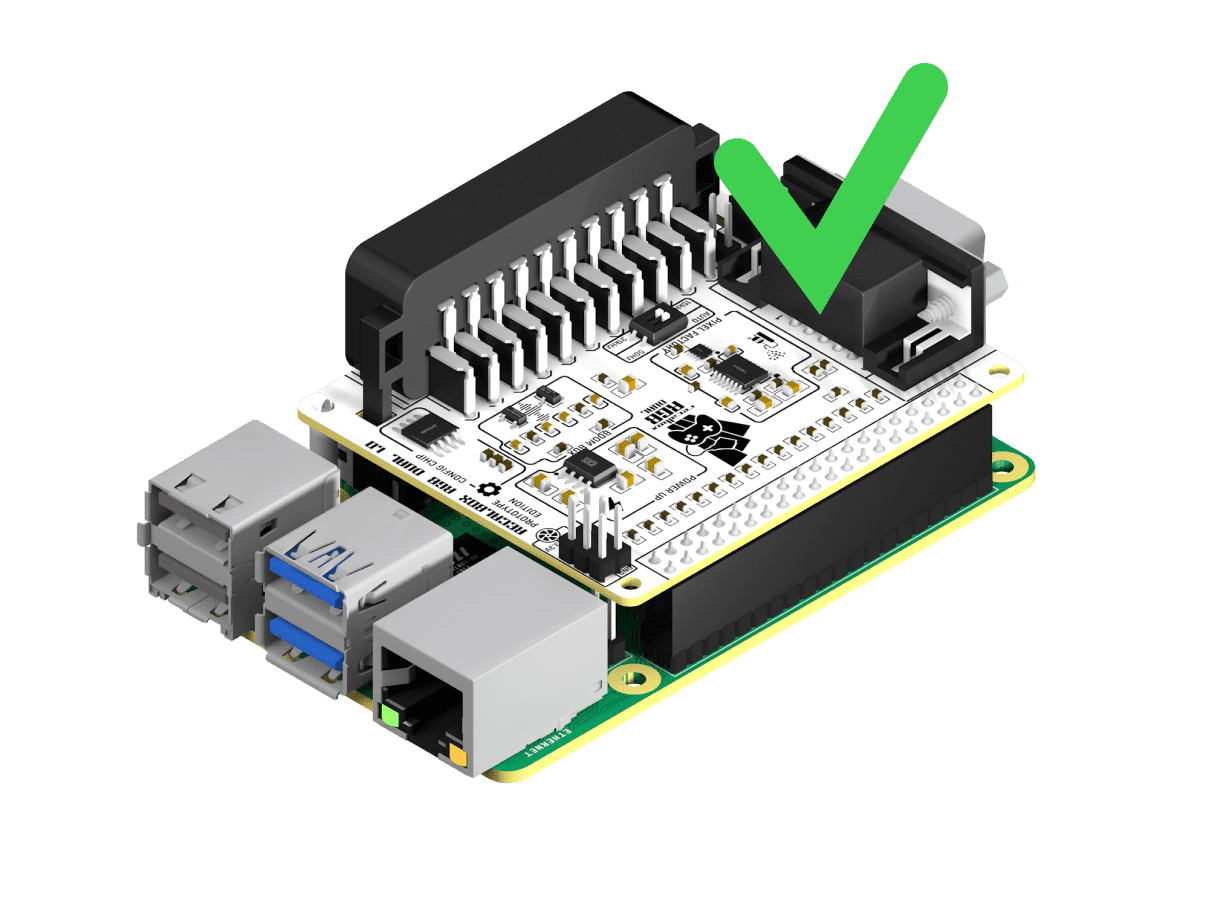
All you've got to do is plug in the SCART cable!
5 - GPIO Extender
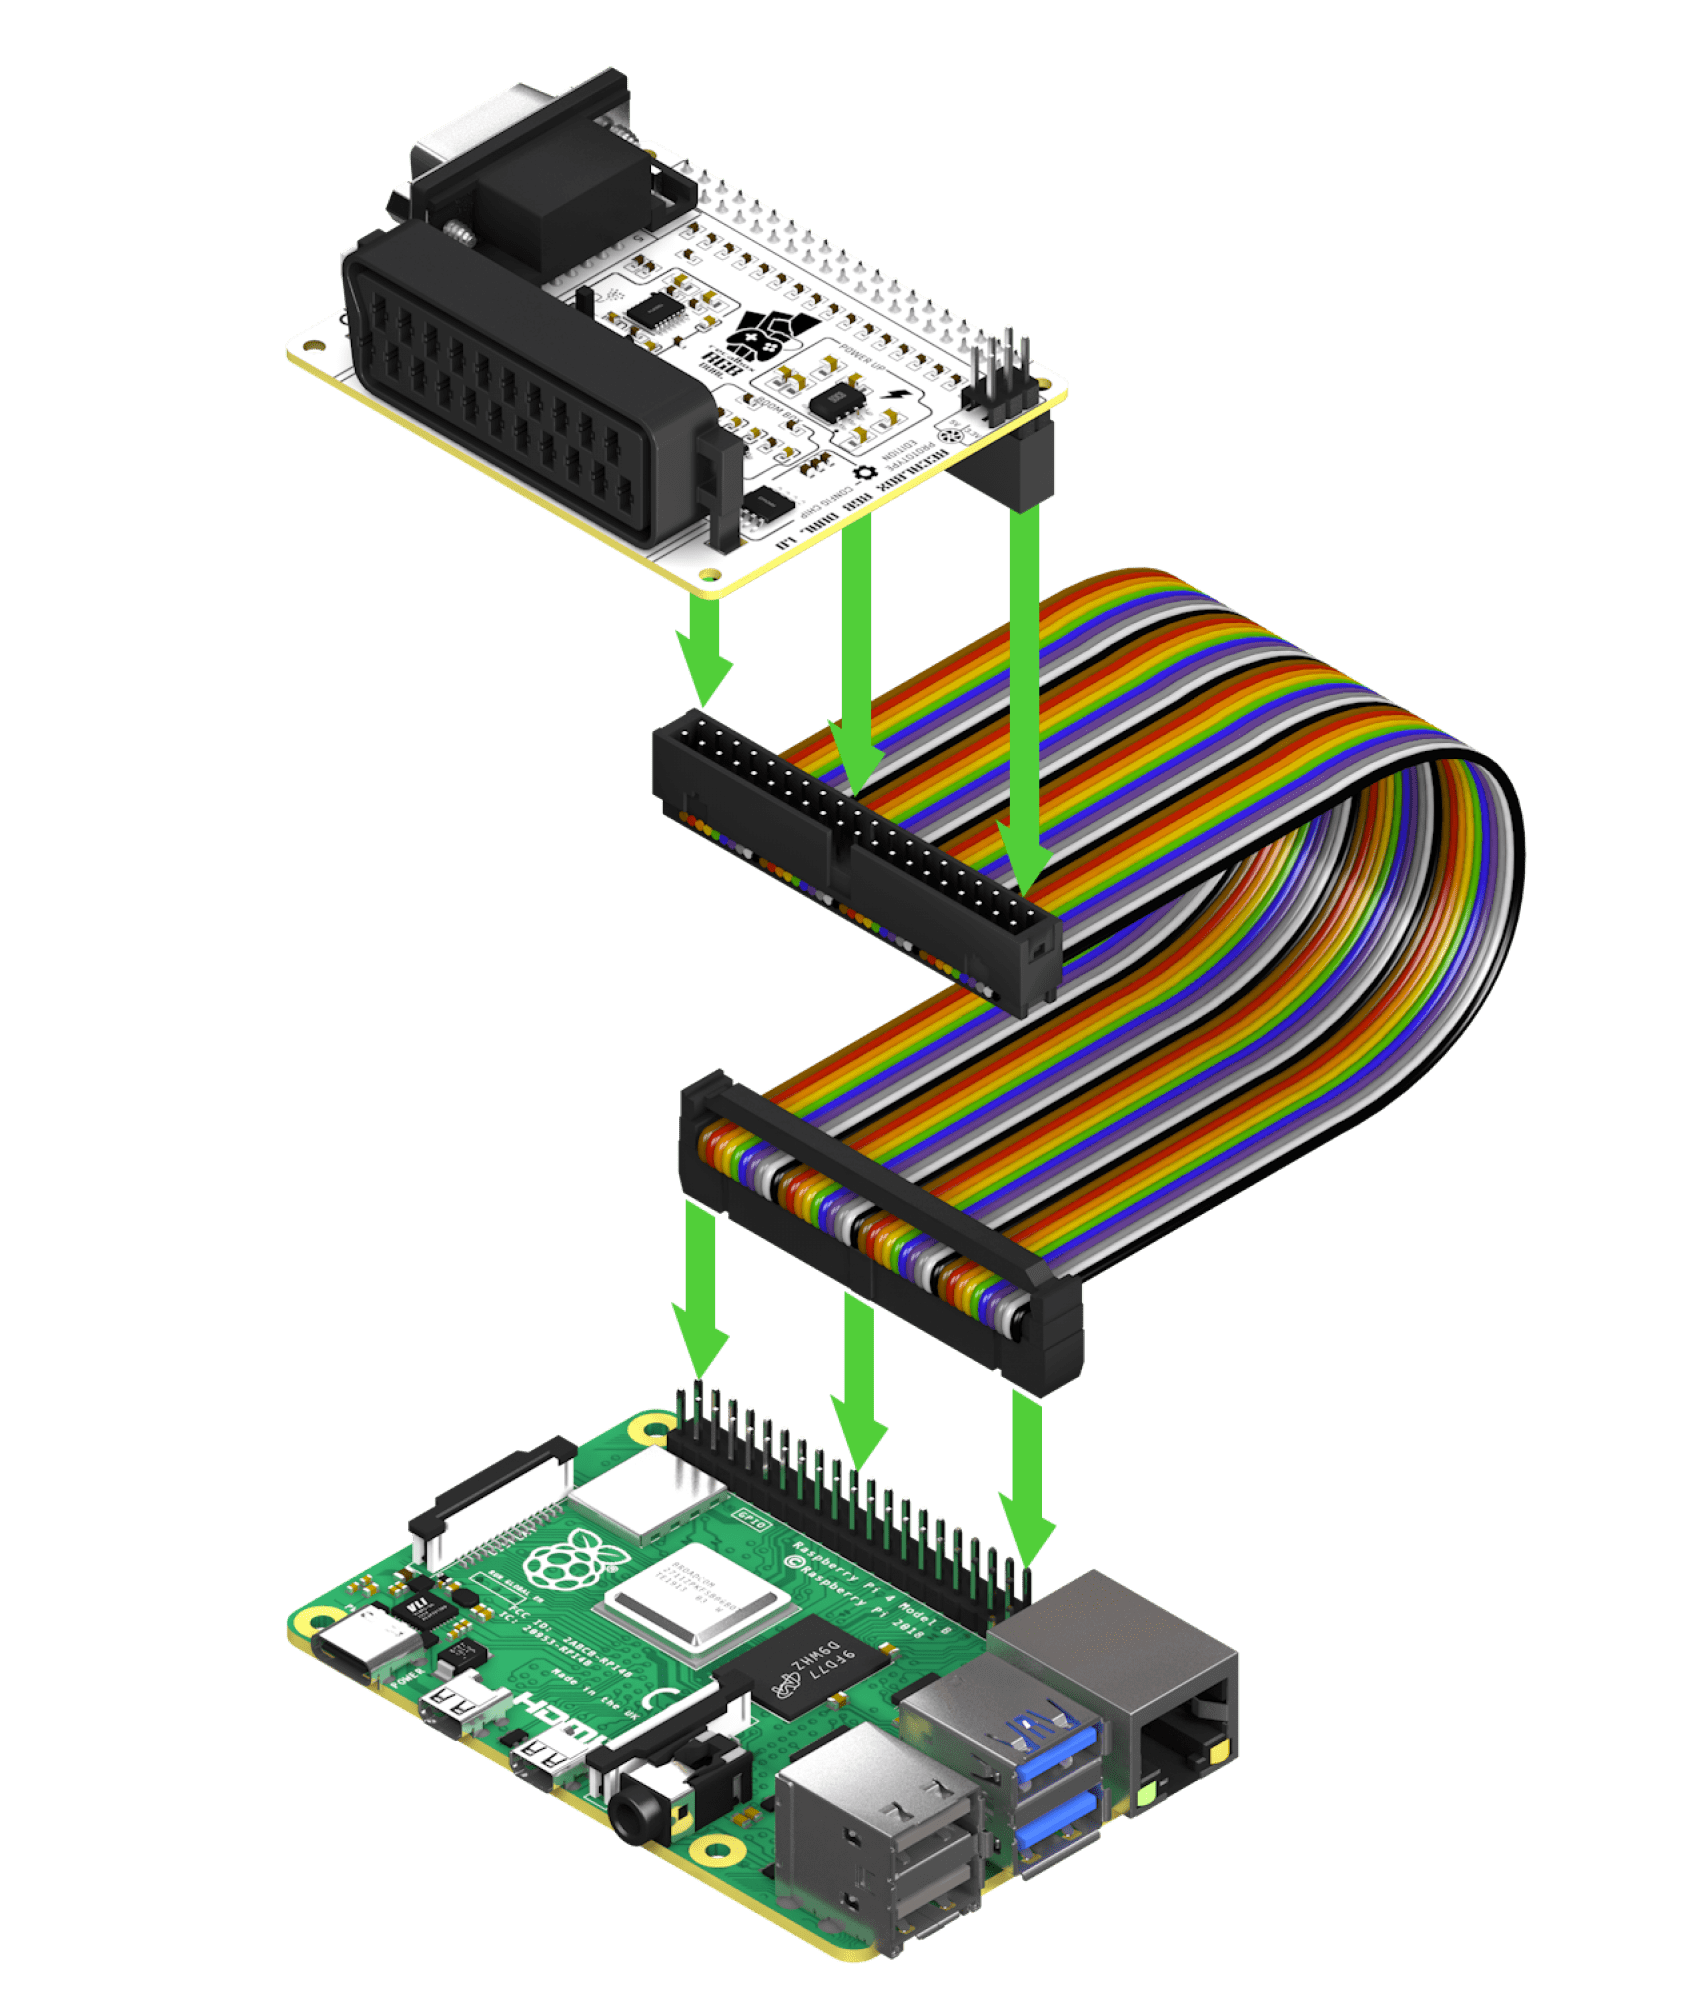
When connecting the GPIO extension cable, always make sure that you place the Recalbox RGB Dual as follows. It's also important to make sure that the 40 GPIOs of the Raspberry Pi are plugged into the 40 inputs of the extension cable, and that the 40 pins of the extension cable are plugged into the 40 inputs of the Recalbox RGB DUAL.
Clip the Recalbox RGB Dual in the same position as for a standard connection:
6 - Raspberry Pi 400
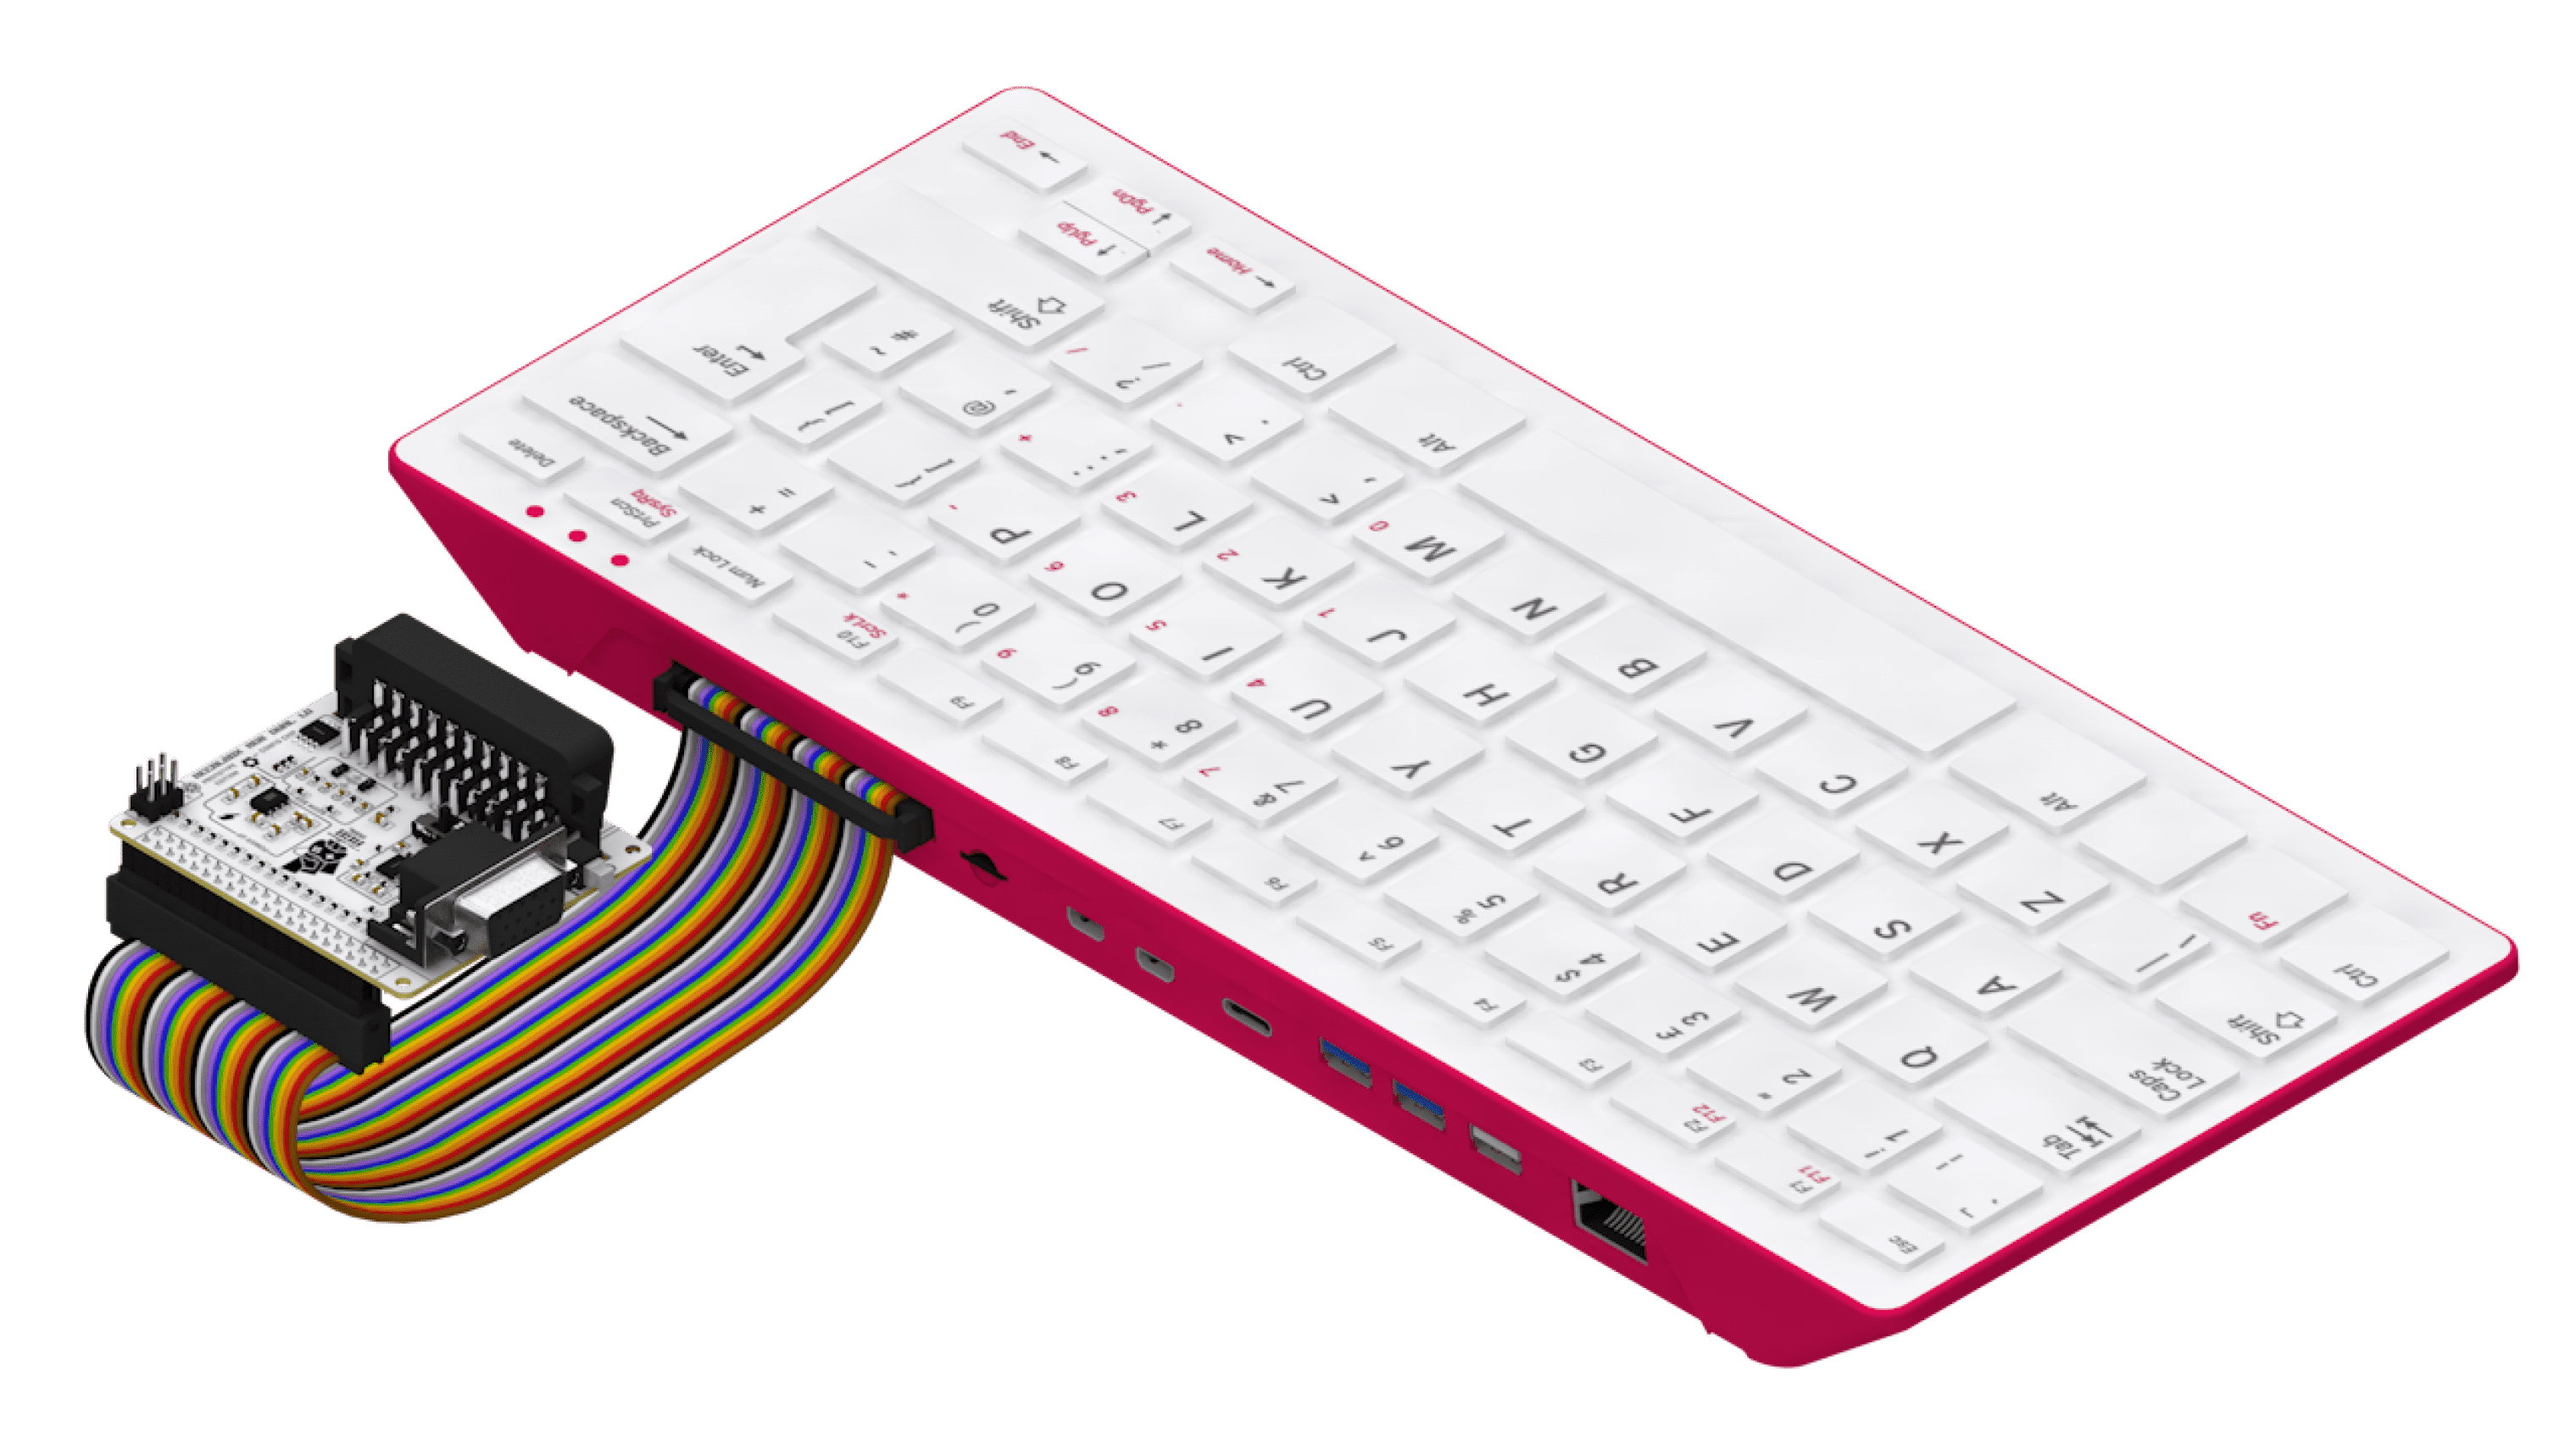
To connect a Raspberry Pi 400, plug the extension cable into the RPi 400, cable end down. Then, position the Recalbox RGB Dual SCART socket towards the front of the Pi 400 to connect it to the extension cable.
7 - Use in a case
If you are using your Recalbox RGB Dual in a case, make sure to disable all the specific configurations for this case (scripts, configuration files). The GPIOs used to communicate with the boxes that have features related to power management or fans may conflict with the operation of the Recalbox RGB Dual.
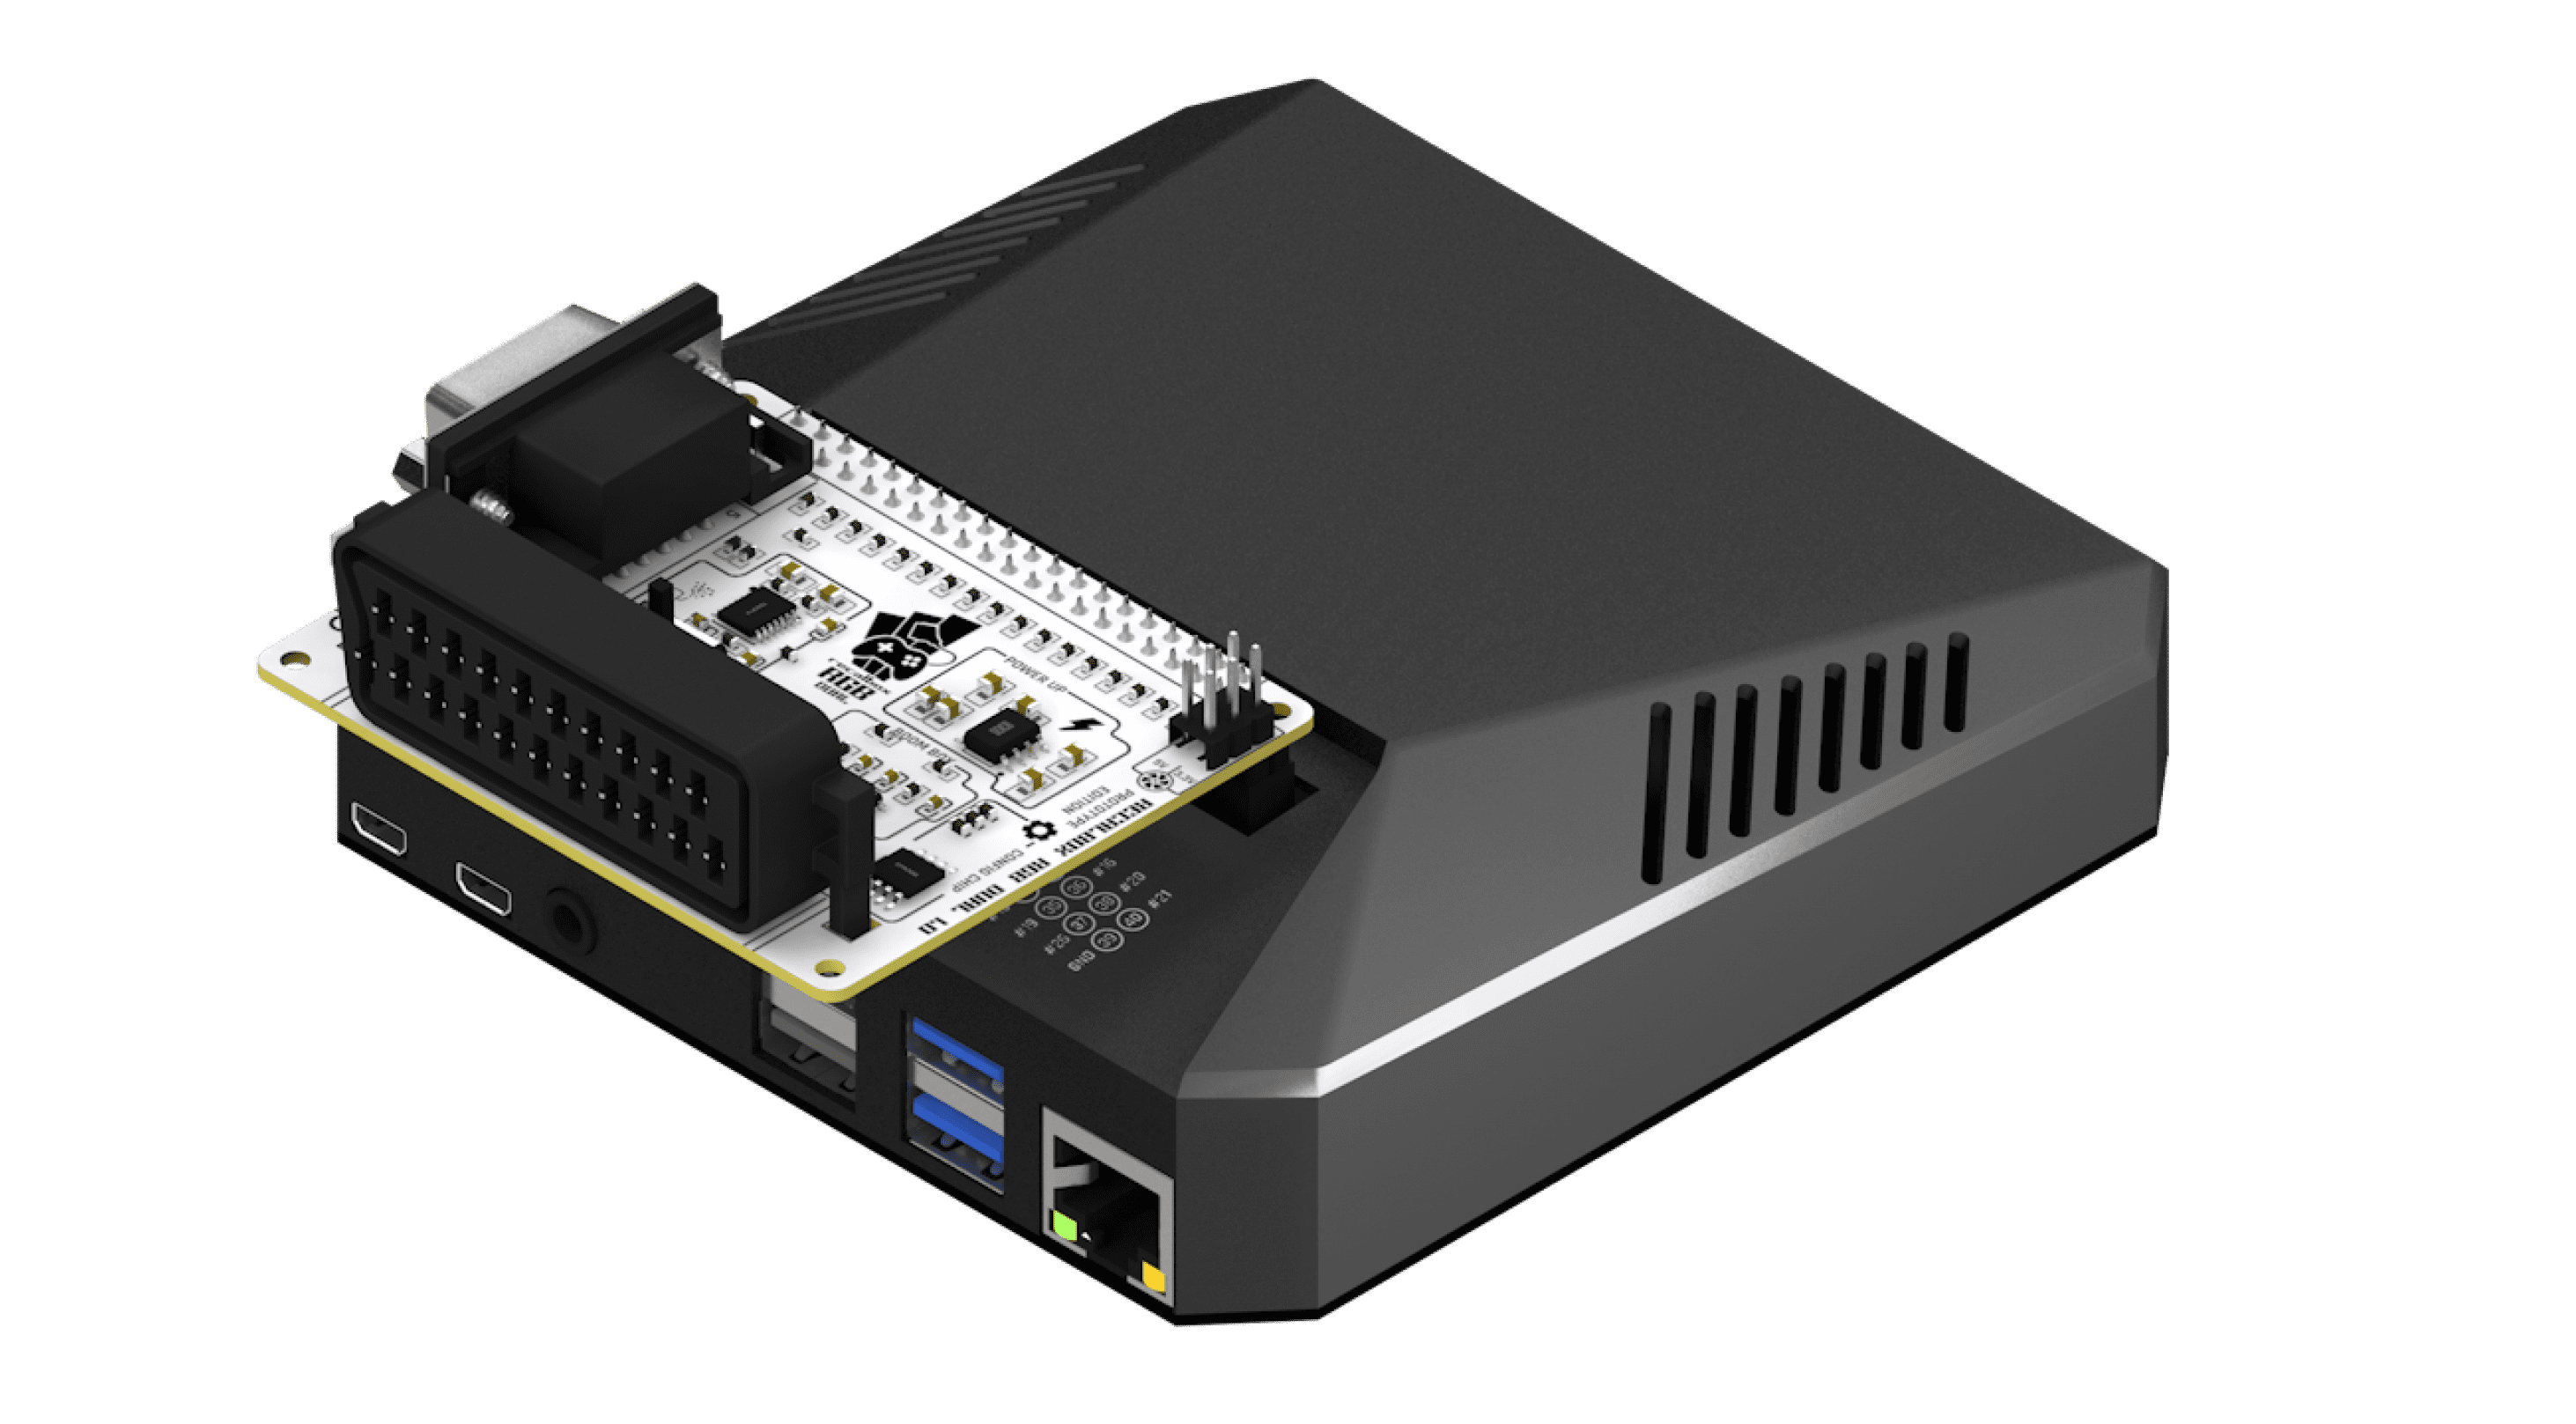
8 - Argon One
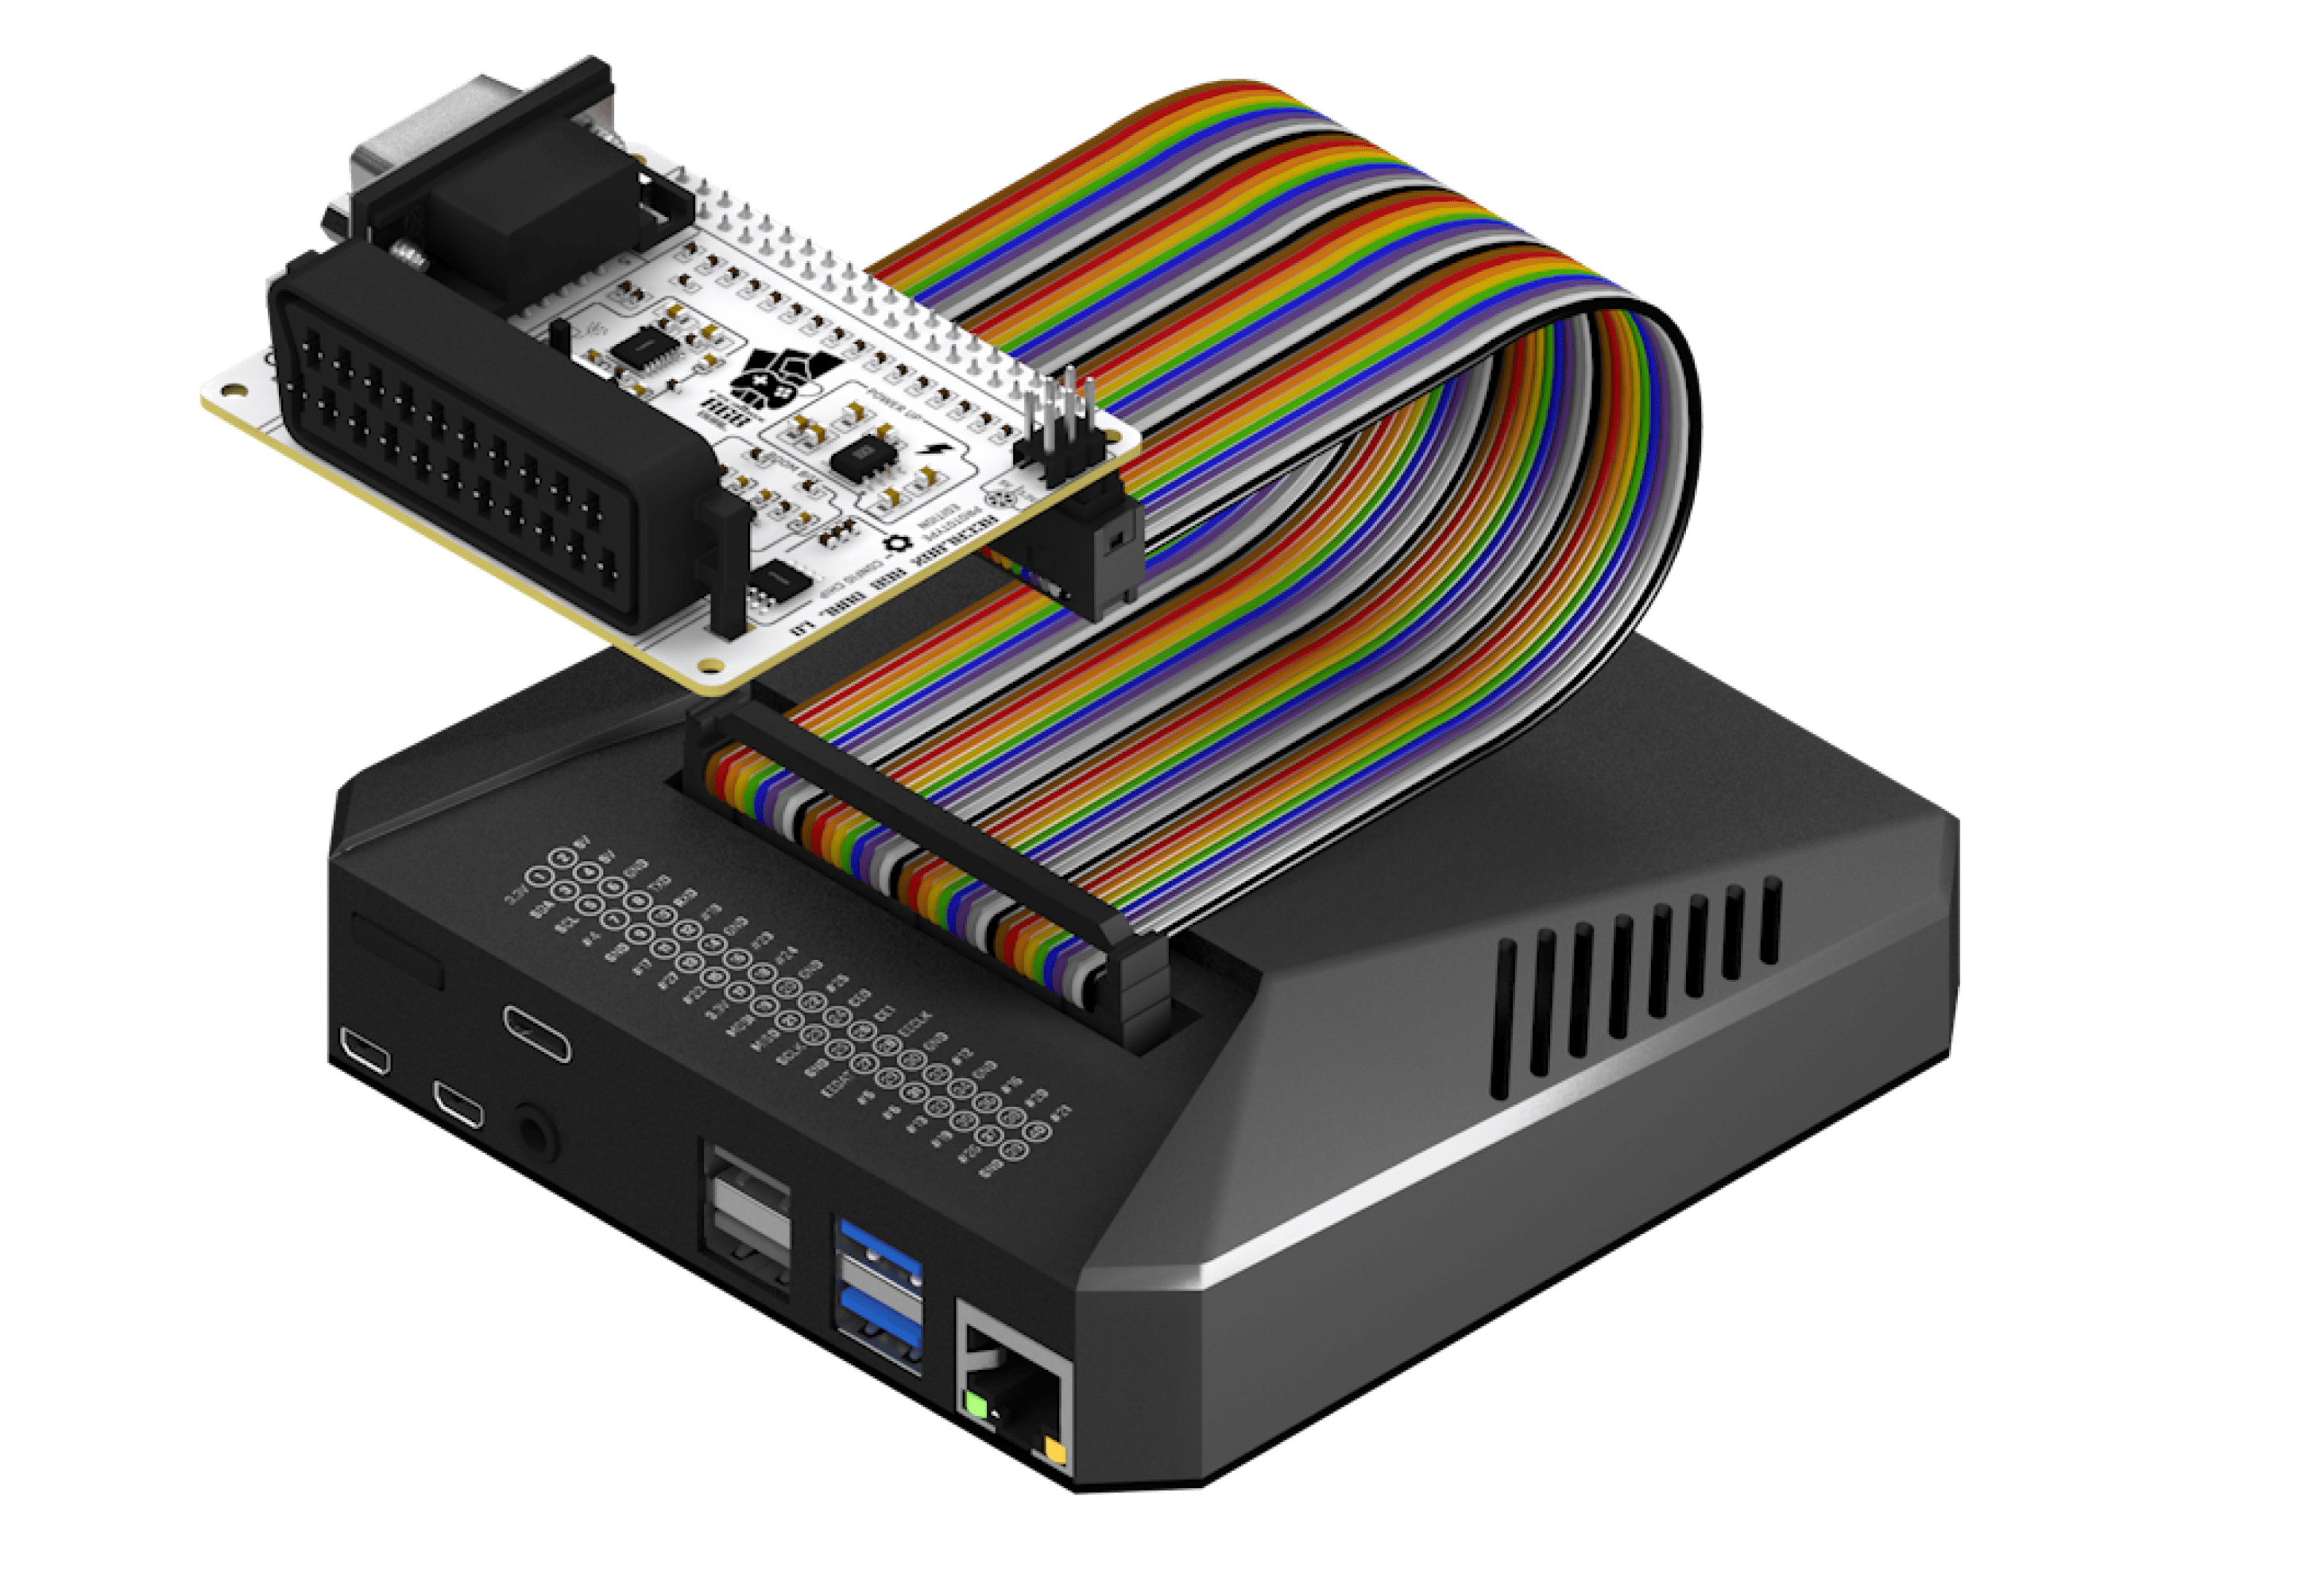
The connection on an Argon One is done in reverse.
9 - 50Hz mode
If the image displayed on your TV jumps, even in the menu, it is probably because it does not support 60Hz. You will have to force 50Hz mode by using the DIP switches on the Recalbox RGB Dual.
Remove the plastic cover from the switch, and with a thin object, move the top switch to 50Hz.
This will force the 50Hz mode on the menu and all games!

10 - 31kHz monitors
If you are using a monitor that supports 31kHz (horizontal refresh rate), you can use the VGA output. To configure Recalbox RGB Dual and allow the system to display games in 480p, use the second switch on the board.
It allows you to force 31kHz mode for games and menus.
This option automatically activates the sound on the Raspberry Pi jack.
If your monitor supports 120Hz, you can activate the 240p on 31kHz option in the CRT menu in recalbox. This mode allows you to display real 240p on 31kHz monitors.

11 - Configuration
Recalbox RGB Dual is Plug and Play and allows you to enjoy your CRT TV without any configuration.
However, we have provided you with some options that might be of interest to you:
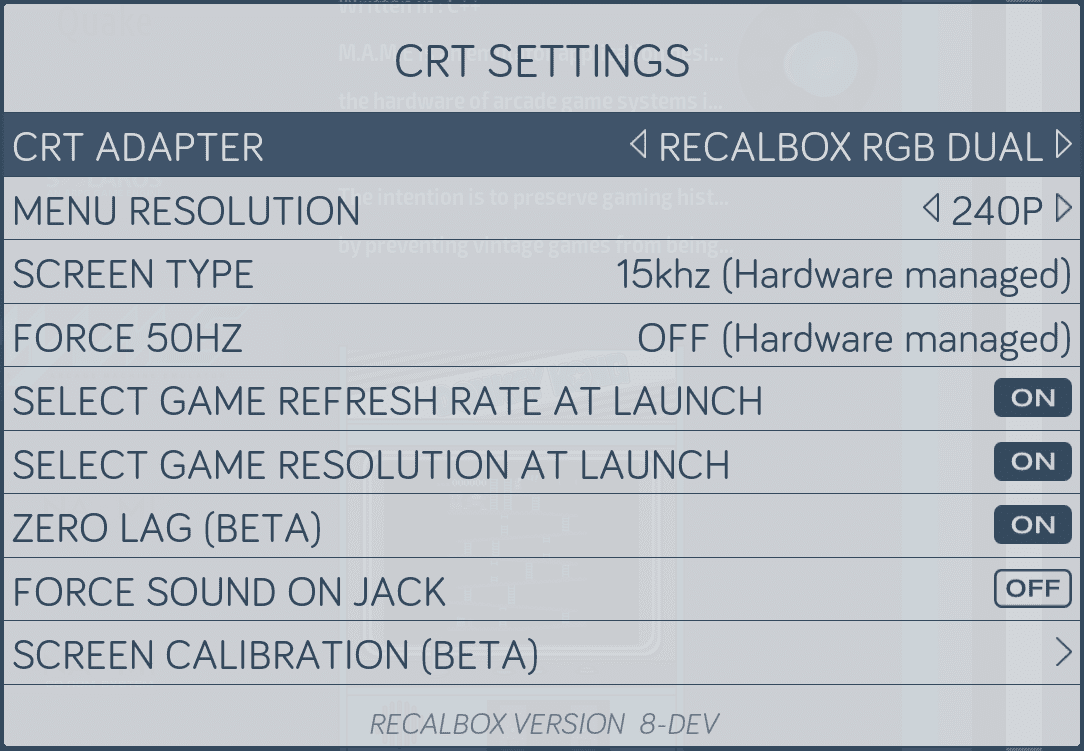
- Menu Resolution: Choose between 240p or 480i for menus. 480i is more readable, but has a slight flicker.
- Select Game Refresh Rate: force the display mode (PAL, NTSC) or region (EU,US,JP) of your game before launching it. If you choose OFF, the selection is automatic.
- Select Game Resolution: force the resolution of the games, at launch, for compatible systems (Dreamcast, Naomi, Atomiswave)
- Zero Lag: automatically configure emulators to minimize input lag !
- Force Sound on Jack: if you want to output the sound on the Raspberry Pi jack, this option is for you. It is automatically activated if the 31kHz Dip Switch is enabled)
- Screen Calibration: allows you to calibrate the position of your screen and the width of the image.
12 - Rpi Zero 2
After soldering your header block to the RPi Zero 2, connect the Recalbox RGB Dual in the same direction as for a Raspberry Pi 4 or 3.
13 - Kodi
Re-watch all your childhood movies and series with Kodi on Recalbox RGB Dual!
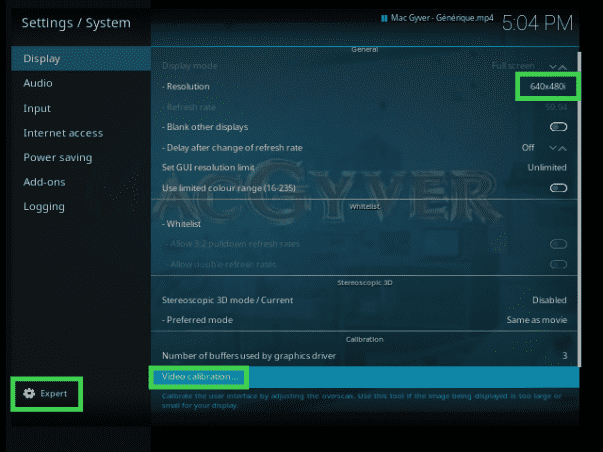
Remember to select the resolution that suits you best in the Kodi options:
- Settings -> System -> Display -> Resolution
Choose an interlaced mode (640x480 or 768x576)
Switch the configuration to expert mode and use the Calibration option to calibrate the screen.
14 - Theme
Only the default theme has been optimized for CRT display. If you use other themes, we cannot guarantee the same readability and display quality.
15 - F.A.Q
- What do I need to enjoy my Recalbox RGB Dual? A complete Raspberry Pi kit (Rpi4, Rpi3 or RPi 400) with a power supply, an SD card and a controller, Recalbox installed on the SD card, and a CRT TV 😀
- Can I connect both SCART and VGA outputs at the same time? No, it's not possible. Current limitations do not allow you to send the signal to 2 devices. Moreover, the signal generated is only compatible with one screen or the other.
- Can I connect an HDMI cable at the same time as the SCART or VGA cable?
No, there is a rule with Recalbox RGB Dual: one cable at a time. - Is it compatible with all CRT screens?
Yes, as long as the screen has an RGB compatible SCART socket. The Pixel Factory allows you to generate a very clean sync signal to ensure compatibility with a maximum number of CRTs. - My Recalbox is in a case, can I work around that? As an option, you can add a GPIO extension cable to your order to move the Recalbox RGB Dual outside your case.
- Are all the consoles and computers available on Recalbox compatible? Most are already compatible (all arcade games and over 70 systems), and future updates will add more.
- Is Recalbox RGB Dual compatible with other distributions? We leave it up to other retro gaming distributions to make their systems compatible with Recalbox RGB Dual.
- What about vertical games? Vertical games are supported on your CRT TVs.
- What about vertical displays? Vertical display compatibility will be implemented in a future version of Recalbox, but don't worry, Recalbox RGB Dual is already ready to support this upgrade.
- Which Raspberry Pi's are compatible? The Raspberry Pi 4 and Pi3 are compatible. The Raspberry Pi 400 requires a GPIO extension (available as an option when ordering)
- What is the size of the Recalbox RGB Dual? 56mmx65mm, it will clip perfectly onto your Raspberry Pi.
- What cables do I need? A SCART cable, which is available as an option when you order. A GPIO extension cable if you already have a case for your Raspberry Pi.
- Is there a power supply to add? No.
- Does it stay out in the open like this? If you are a Maker, we give away free STL files to print your case in 3d on your printer or in a FabLab near you !
- Why do we talk about Hz and kHz? When we talk about refresh rate, there are two units: HZ for vertical refresh rate (60Hz = 60 frames per second), and kHz for horizontal refresh rate (15kHz = 15,000 displayed lines per second). The ratio between the two is quite simple to find. The horizontal refresh rate is (almost) the number of lines per frame (240 for example) times the number of frames per second (60).